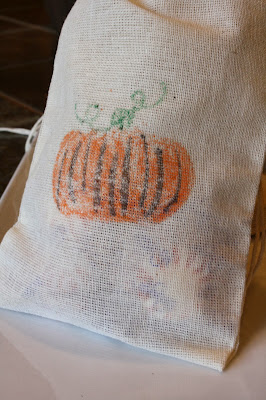
If you want to get an early start and are looking for a Halloween craft project, you have come to the right place! I recently made these Halloween treat bags using a crayon transfer technique that is fun and easy.
For this project you will need:
Muslin or cloth bags
Muslin or cloth bags
Vellum (translucent) paper
Crayons
An electric Iron
An electric Iron
To start, color a picture on the vellum paper with crayons. Remember that after ironing, the image will be reversed, so be sure to draw the letters backwards if you want to use a word. To do this, you can write the word on the front side of the paper with a pen and then flip over the paper and use the crayon to trace the word.
Once you are finished with the drawing, place the the paper crayon side down on the fabric bag.
Put the iron on the hottest setting to melt the crayon and transfer the image to the fabric.
The transferred image is better with the brighter colors. For instance, orange showed up really well, but the black was somewhat faded.
I made treat bags with a spider, pumpkins, and the word Boo! I think this project is very simple to do and is a lot of fun.
This is also a great way to save your children's drawings for the future!
There are many other suggested crayon transfer techniques on the web, including the use of fabric crayons, and sandpaper instead of vellum. Do what works best for you with the supplies that you have on hand.
I will be making this project for free this Saturday, September 28 at Maker Faire Louisville. Join me and some of my crafty friends, including DIY Louisville. It will be fun!


No comments:
Post a Comment