Showing posts with label recipes. Show all posts

Saturday, April 25, 2015

Mint Julep Brownies


The Kentucky Derby is one week away! This is an exciting time in the city of Louisville, from the Balloon Glow and Race to the Pegasus Parade to Oaks Day on Friday and the Kentucky Derby on Saturday. It's quite the celebration, and what's the best thing about a celebration? Delicious desserts of course!

Thus the creation of Mint Julep Brownies! I was inspired by my friend Jamie, who came up with this idea. The Mint Julep is the official drink of the Kentucky Derby, so it's only fitting to use the flavor combination of mint and bourbon in a chocolate-y dessert. 

This recipe is so simple, because you only need a few ingredients: 
1/4 cup of Bourbon
1 box of Brownie mix (and the ingredients required to make the brownies)
1 box of Andes Mint Chocolates


The first step is to unwrap each chocolate Andes mint and cut the chocolates into smaller chunks.


Next, mix the brownies according to the package instructions.


After the brownie mix is ready, add 1/4 cup of Bourbon to the batter.


Finally, add only half of the Andes mints to the brownie batter and stir.


Pour the batter into a baking dish (9x9 or 9x13 is fine) and then add the second half of the Andes mints to the top of the brownie batter.


Bake the brownies according to package instructions and allow to cool, if you have the patience!


 A great tip for cutting brownies is to use a plastic knife. It makes it much easier!  


This is probably the first time that a Kentucky Derby glass has held milk instead of a Mint Julep, but you can get your mint and Bourbon flavor fix in these yummy brownies. The Mint Julep brownies taste WAY better than the Mint Julep drink anyway, trust me!

I hope you enjoyed this easy recipe and that you have a great Derby week! Click here to check out more of my Kentucky Derby Festival recipes and crafts.

Thursday, March 13, 2014

Luckcakes (Lucky Cupcakes for St. Patrick's Day!)


I am so happy that the first signs of Spring are finally showing! We had some 60-70 degree Fahrenheit weather temperatures recently, the daffodils outside are sprouting, and I keep seeing green for St. Patrick's Day! These lucky charm cupcakes or Luckcakes are easy to bake and make fun treats for the holiday.


You only need a few supplies for this recipe: 
Boxed white cake mix
Colorburst Batter Bits (green)
Vanilla frosting
Cupcake liners
Shamrock marshmallows (from Lucky Charms Cereal)


Prepare the cake batter using the box instructions. Mix in the green colorburst batter bits. I found these in the grocery store, but you could probably find them at baking stores or specialty craft stores as well.


Line your cupcake trays with the paper cupcake liners. Fill the cups a little over halfway. Bake as directed on the box, and allow to cool. Add the vanilla frosting and shamrock marshmallows last.


These cute cupcakes are a visual delight! The Lucky Charms marshmallows are a whimsical topping, and the green batter bits make for a special surprise inside.


With these cupcakes, you'll get kissed and not pinched! Happy St. Patrick's Day!

Wednesday, February 26, 2014

Video: Mini Mardi Gras King Cakes


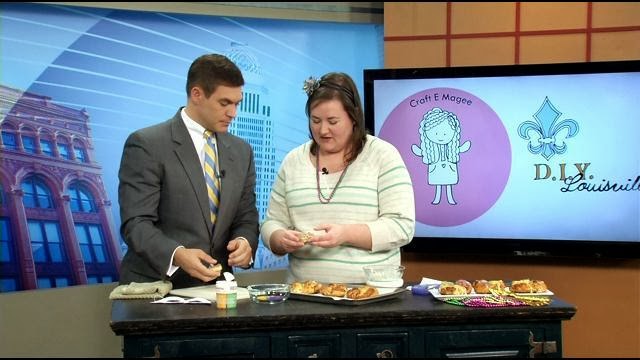
I enjoyed making my mini King Cake recipe on WDRB in the Morning last week, and even got a little help from Sterling Riggs during the television segment!  Mardi Gras is one week away, on Tuesday, March 4, so you have plenty of time to get into the Holiday spirit by making these simple sweet treats at home.


I appear in regular craft segments for WDRB in the Morning, usually every other Wednesday. Locals can see me again on Wednesday,  March 5 or visit my Facebook page for the link. To see more videos, check out my YouTube channel. Thanks for watching!

Tuesday, February 18, 2014

Mini King Cakes for Mardi Gras!


It's quite possible that I am developing an unhealthy obsession for making miniature desserts. First it was the Mini Pies for Derby, then it was the Mini Pumpkin Pies for Thanksgiving. Now, it's Mini King Cakes (Prince Cakes?) for Mardi Gras!

King Cakes are a traditional food in New Orleans, Louisiana during the weeks leading up to Mardi Gras. The tradition goes that a plastic baby or other charm is hidden inside once the cake is cooked, and then the cake is decorated with icing and purple, green, and gold sugar (colors representing justice, faith, and power). The person who gets the piece with the baby inside must bake the King Cake for the next gathering, and so it goes until Mardi Gras or Fat Tuesday.

In Louisville, we have a kinship with Louisiana, given that we are both named for French Monarchs (Louisiana for Louis XIV and Louisville, Kentucky for Louis XVI) and the Fleur de lis is a major symbol for both the cities of New Orleans and Louisville. Louisville also has the highest number of shotgun-style homes next to New Orleans.

So to celebrate Mardi Gras, I thought it would be fun to make these easy mini King Cakes, using cinnamon rolls as a shortcut to the traditional sweet bread dough.


You only need 3 simple supplies for these tasty cakes: a can of cinnamon rolls (with icing), colored sugar in gold or yellow, green, and purple, and a plastic baby!

After opening your can of cinnamon rolls (8 rolls will make 4 mini King cakes), preheat your oven as directed. My package called for 400 degrees Fahrenheit.


Take one cinnamon roll and split it at the side to create a crescent shape. Do this with one more cinnamon roll. Next, twist the ends of these two crescent shapes together and then twist into a circle.


Press the other two ends of dough together to complete the circle. This makes one mini King Cake. Bake your King Cakes as directed on the cinnamon roll packaging. In my case, I baked four mini King Cakes for 13 minutes at 400 degrees Fahrenheit.


The finished mini King Cakes are so pretty!


Pick one of the mini King Cakes to hide the plastic baby or charm inside once they have been cooked. Cooking the plastic charm inside the oven is not recommended! Now you are ready to decorate. The great thing about using cinnamon rolls for these mini King Cakes is that you already have the icing too!


To make the icing go on smoothly, just heat it in a glass bowl in the microwave for about 10 seconds, and drizzle on the cake with a spoon. You must sprinkle the sugar on the icing before it dries, so I recommend icing and sugaring each mini cake one at a time.


Remember to sprinkle each cake with gold, green, and purple sugar: the traditional colors of Mardi Gras! There's really no wrong way to decorate or make these mini King Cakes. The more homemade they look, the better, in my opinion!


Don't they just look yummy?! Trust me, they are! These are the perfect treat for Fat Tuesday, right before the traditional fasting season of Lent. I hope that you enjoy making these mini King Cakes. They are so easy to make using the cinnamon roll dough and icing as shortcuts. This year Mardi Gras is on Tuesday, March 4, so you have plenty of time to make these cakes and get into the holiday spirit.


Bon appetit and as they say during Mardi Gras, "Laissez les bons temps rouler" or Let the good times roll!

Tuesday, November 26, 2013

Mini Pumpkin Pies for Thanksgiving

Why is it that miniature foods are so much fun? I've had the "mini" bug ever since I made these KY pies earlier this year for Derby. When I started to think about getting ready for Thanksgiving, I decided that I wanted to try to bake some miniature pumpkin pies. These pies aren't just cute, they are delicious, too!


The best part about these mini pies is that they are easy to make. You only need a few ingredients for this recipe:
1 Can (30 oz.) Easy pumpkin pie mix (I used Libby's brand)
2/3 Cup of Evaporated Milk
2 large eggs, beaten
2 refrigerated pie crusts
Cupcake or Muffin pan


Unroll the pie crust and use a bowl or cup to cut circles out of the dough.


Push the circles into the cupcake pan. You're half way there!


Next just combine the pumpkin pie mix, evaporated milk, and eggs. While you are mixing the ingredients, preheat the oven to 425 degrees Fahrenheit.


Spoon the pumpkin pie mix into the cups in the pan.


Once all the cups are filled, bake the pies for 5 minutes at 425 degrees Fahrenheit, and then lower the temperature to 350 degrees and continue to bake the pies for 20-30 minutes depending on your oven and altitude. Pumpkin pies can be temperamental, so be sure to check on them frequently. 


The pies are done once a toothpick inserted in the middle comes out clean. Let the pies cool and then refrigerate, since pumpkin pies are best served cold. You can even add whipped topping (or cake frosting!) to make these mini pies even more special for Thanksgiving.  


Wishing you a Happy Thanksgiving from the Craft E Magee family to yours!

Wednesday, October 30, 2013

13 Crafts for October 31


It's not too late to make one of these fabulous craft projects for Halloween! Julee from D.I.Y. Louisville and I love Halloween. Here is a quick collage of some of our best projects to make for the Holiday, or as I like to call it, Craftoween! Be sure to pin this image to remember it for next year too! Just hover over the image with your mouse and click "pin it."

Projects from left to right on the image:

  1. Eat, Drink and Be Scary sign
  2. Edible blood recipe
  3. Frankenbox craft
  4. Ghost Garland
  5. Monster Wreath
  6. Spooky Styrofoam Spider
  7. Pumpkin Needle felted scarf
  8. Trick or Treat bag
  9. Wall Witch decoration
  10. Floating Ghost 
  11. Owl plaque
  12. Ghost cupcakes
  13. Crayon transfer treat bag

Wednesday, October 23, 2013

Edible Dracula Blood Recipe

On August 17, 2013, Actors Theatre of Louisville had a Block Party to celebrate their 50th Anniversary season! There were tours of the theatre, booths outside with different activities, and more. Our favorite booth was "Dracula's Diner" where you could make your own fake (edible!) blood.


The Production department at Actors Theatre created this recipe and shared it with Block Party guests. I learned that the stage managers make the blood themselves before each performance of Dracula, on stage until October 31! 


Actors Theatre of Louisville Dracula Blood Recipe* (It's edible!)
4 CoffeeMate creamers
2/3 cup water
1 cup chocolate syrup
64 oz. corn syrup
10 teaspoons red food coloring
6 drops blue food coloring

*This recipe makes a lot of fake blood! I used less in my step by step below.

My version of the recipe divides the original by 4.
So I used 16 oz. corn syrup, 1 coffee creamer, 1/6 cup water, 1/4 cup of chocolate syrup, 2.5 teaspoons of red food coloring and 1-2 drops of blue food coloring.


Pour each ingredient into a bowl, and stir.


The corn syrup adds the consistency to the blood. The chocolate syrup adds taste.


The creamer helps the food coloring dye the blood the right color.


When adding the food coloring, you should stir in between until you get just the right color of red. Be careful not to add too much blue or the blood looks like a dark raspberry sauce. You want it to be a nice bright red.


You can also buy some fun containers like vials or syringes to display the "blood." These make a fun prop for Halloween!


My nephew really loves this fake edible blood recipe from Actors Theatre. But what does is taste like, you ask??


The kid tested answer was: "tastes like chocolate!" That's reason enough to try this recipe for Halloween, don't you think? Unless you're scared of attracting a vampire's attention of course!