Saturday, August 28, 2021

Our favorite craft project


Ten years ago I nurtured the idea to show off my handmade dolls and crafty creations, and so Craft E Magee was born. I poured my blood, sweat, and tears into making many things over the years and am proud of all the things I've made. But of all the things I've ever created, I'm most proud to introduce you to my twin babies: A & S! 

I wanted a family of my own for so long, and it wasn't an easy road for J and I to get here, but these little babes were born in 2021 and we couldn't be happier. Being a twin parent is sure to keep me busy, but I am excited to get back to making things for these two. To start, I made some onesies, including the "Best Friends" ones pictured here. I've also got plans to make them each their own quilt, as I did with all my nieces and nephews, and of course, some dolls!

Tuesday, November 10, 2020

Birthday shaker card

COVID-19 really put a damper on my craft blogging resolution for 2020. It's not so much that I haven't made things throughout the year, but mostly that I haven't taken pictures of the projects or created any content for this blog. So, now it's November, and I'm attempting to get back at it. 

Because Coronavirus cases are not under control in Kentucky, my cousin won't be able to have a birthday party this year. Social distancing can be hard, especially for teenagers, so I wanted to make her a special card to make her smile for her birthday. 

I decided on a shaker card in the shape of a balloon. Who doesn't love a little sparkle? Especially when it's contained! Shaker cards are perfect for that. Inside the balloon, I used purple micro beads, pink heart confetti, and blue/purple confetti dots against a blue background. For some extra fun, I added a twine string detail to the outside of the card. 


You'd think with all the extra time at home, I would have created a lot more, but I'll admit to a lot of binge-watching movies and shows. Sometimes a fun and easy paper project like this shaker card can get you back into the crafting spirit. What are you doing to keep up your crafting this year? 

Thursday, May 7, 2020

DIY gifts for Mother's Day

Mother's Day will look a little different this year because of the Coronavirus pandemic. Normally we would all get together to do a nice brunch or dinner for the moms, but social distancing will keep us apart for now. That doesn't mean that Mom has to be forgotten! Here are a few simple gifts that could be crafted and mailed to your favorite mom, or dropped off with a no-contact delivery. Save those hugs and kisses for later.


Paper clay is a no-bake clay, so all you need is some time to air dry your project. For texture, stamp the clay before it dries. Paint the dish mom's favorite color and seal it with a coat of matte or glossy glue.


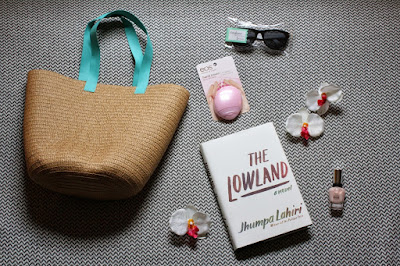
Is your mom a reader? A chef? An athlete? A fashionista? This post has you covered with ideas for filling a cute tote bag with items Mom will love. Bonus points if the tote bag is handmade. (Though the one pictured was purchased at Target!)


Let your imagination guide you to create flowers from pipe cleaners and display them in a cute paper bucket. This would be a very happy porch present for Mom!


Only three steps needed to complete this fabric necklace: stitch a fabric tube, and alternate filling the tube with wood beads and tying knots. Super easy!


I first made this gift with my nephew for Father's Day, but it works for Moms, too! Let the kids draw on any wood item (box, pendant, cutting board, etc.) with a pencil, then the adults can burn over the drawings with the woodburning tool. Staining is optional on your finished product. 

-------------------------------------------------------------------------

Even though you may not be able to spend the day with Mom, you can still remember her on Mother's Day with one of these special crafts.

Wednesday, April 8, 2020

Cardboard Spring decor


Nothing can take the place of spending time with family and friends, but due to COVID19 a lot of us aren't able to be together. That's hard, especially if you are celebrating Spring holidays. Crafting is my go-to thing whenever I'm celebrating a holiday or whenever I'm struggling with hardship. Since I'm currently experiencing both, I thought I'd take some time to share this project with you.


Before the pandemic, I was lucky to get together with my friends Julee and Patty to make some Spring decor. We used corrugated cardboard to make different Spring shapes. I chose to make a bunny and an egg. They are super cute, lightweight decorations. I decided to display mine on my mantel with some Spring flowers. 

Now I'll show you how you can make them, too.


For supplies, all you need is glue, a foam brush to apply the glue, and strips of corrugated cardboard (if you don't have any corrugated cardboard, think creatively--using cardboard packing material, or strips of paper or posterboard).

Beginner cardboard shape: Egg


The egg shape is the easiest to make with the cardboard. 

1. Begin to roll the cardboard in a circle (corrugated/bumpy side facing out). 

2. If you need to tighten your circle, place your thumb on the center of the circle and use your other hand to pull the cardboard tighter. 


3. Make the circle as small or as large as you like.

4. Once your circle shape is complete, squeeze one side to create the pointy end of your egg.


5. Glue the loose end of cardboard to the egg.

6. Coat the rest of the layers of the egg with the glue. Let side dry and repeat on opposite side.


Advanced cardboard shape: Bunny


The bunny shape is a little more intricate to make, so if crafting with kids, they'll probably need some assistance.

1. Using shorter strips of cardboard, make an oval for the head and a longer oval for the ears. Glue the ends of the cardboard strips to the shapes.

2. To attach the ears to the head, use another strip of cardboard to wrap around the pieces.


3. One layer might be enough, but if it's not...

4. ...wrap a second layer of this strip around the head and ears.


5. Secure the end of the strip with glue. Coat one side of the head with glue and hold the shape you want in place for a few minutes. The glue dries pretty quickly since you're working with cardboard/paper. Repeat coating of glue on opposite side of head.


6. To make the bunny body, roll strips of cardboard into circles or ovals. The number is up to you. Secure ends of strips with glue.

7. To keep the circles together for the body, wrap another strip of cardboard around them all.


8. Play with the shape to give it the look you like.

9. Coat both sides of the body shape with glue.


10. Attach the head to the body with the glue and hold in place until secure. Coat both sides with glue. 


As you can see the backside of my bunny stuck to the paper because of the glue, but that's okay because the front side looks fine!


You don't have to stick with eggs and bunnies. You could try chicks or flowers or anything for Spring! It's a fun and easy project to make and hopefully you already have some supplies on hand to make this.

Friday, April 3, 2020

Photo Friday: Checking In

I've been pretty fortunate to get to work from home during some of this COVID-19 situation. I'm using my husband's home office space and even though I keep the window blinds open, I still feel like I need a daily walk to get outside. The weather lately has been pretty nice. Don't worry, I'm doing everything in a manner that our Kentucky Governor, Andy Beshear, would approve! Here are just a few photos from a recent walk around the neighborhood.


I've been proud of our state's response to this issue and even though I can't wait to hug family and friends again, I will do my part to keep us all #HealthyAtHome!

Saturday, March 14, 2020

Offline Activities to Help You Decompress

I don’t know about you, but I am feeling a heightened amount of anxiety and stress right now due to the Coronavirus COVID-19 pandemic. It is so important for all of us to stay informed and be responsible world citizens right now, but I find myself constantly refreshing every digital app in a way that is not good for my mental health. I decided to make a list of offline things I can do during my free time and am sharing it in case it helps others.


-Make cards or write letters.

-Transcribe family recipes.

-Dust off and use the sewing machine/crochet hook/knitting needles/[insert craft tool here].

-Read books or magazines.

-Light some candles and take a bubble bath.

-Cook or bake a favorite treat.

-Update your bullet journal or diary or start recording your experiences during this time to look back on.

-Do some Spring cleaning around the house.

-Take a walk around your neighborhood (keeping social distancing in mind). 

Let me know in the comments: what things you would put on your list?

Tuesday, March 3, 2020

Rainbow Pop-Up Card for St. Patrick's Day


St. Patrick's Day is a great holiday for crafting. This year I decided it would be fun to make some pop-up cards. You could really use any motif for these pop-up cards: shamrocks, a pot of gold, a leprechaun, or a rainbow like I did. 


All you need for this project is paper in rainbow colors (I used cardstock), scissors, and some glue dots. You could use liquid glue or a gluestick, but I didn't want the paper to warp at all, so I decided to use glue dots.

For this project, I free-handed all the shapes, but if you don't want to do that you can use a template from the internet. An easy way to remember the rainbow colors in order is "ROYGBV" (red, orange, yellow, green, blue, violet). Cut out a half circle or gumdrop shape of each of those six colors, making each one a little smaller than the next. The white paper is for the cloud shapes.


Once your shapes are cut out, you are ready to prepare your card base. Fold the piece of paper (mine was 8.5x11") in half. On the folded side of the card, use scissors to cut four slits (two on each end) of the card as shown below.


Start with one cut on the left end of the folded side of the card...


...then cut the other three notches as shown below.


Once you've cut your notches, you can open the card and pop out the paper tabs. This is what you are going to attach your rainbow shape to for the pop-up card.


First use the glue dots to assemble your rainbow in ROYGBV order.


It's optional to cut out the center of the rainbow. I think it could look cute either way. Once you are satisfied with your rainbow shape, place glue dots on the bottom part of the tabs cut in the card.


Line the bottom of the rainbow shape up with the bottom of the paper tab slits, then press onto the glue dots to secure.


You should now have a functioning pop-up card. Hooray!


 Now you can embellish the rainbow card with clouds and a happy message for St. Patrick's Day.


I plan to send these happy cards to my grandmothers for a little love via snail mail. Who would you make a rainbow pop-up card for?