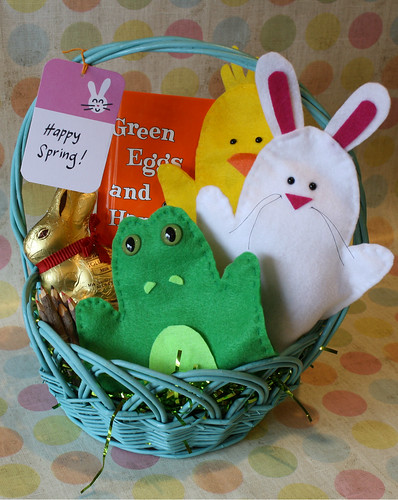
Spring Hand Puppets
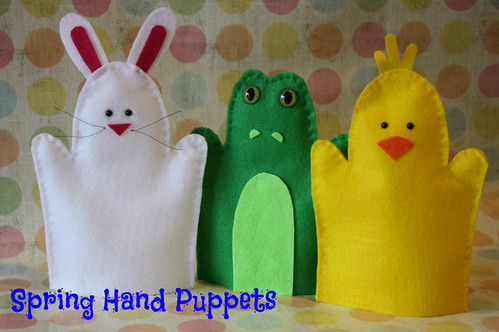
This project is simple, fast, and lots of fun! Using one pattern, you can make hand puppets for three different furry friends. Let's get started!
CHICK PUPPET
1. Download the free pattern I created for the Spring hand puppets.
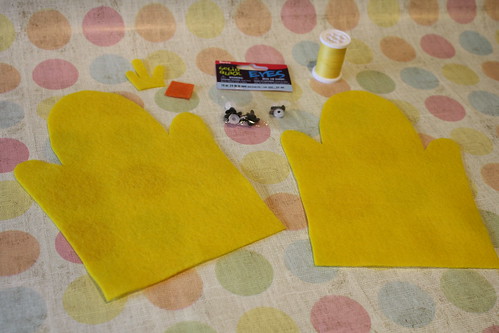
2. For the chick puppet you will need:
Yellow felt
Solid black animal safety eyes (can be found at any craft store)
Small piece of orange felt
Glue
Yellow thread & a needle
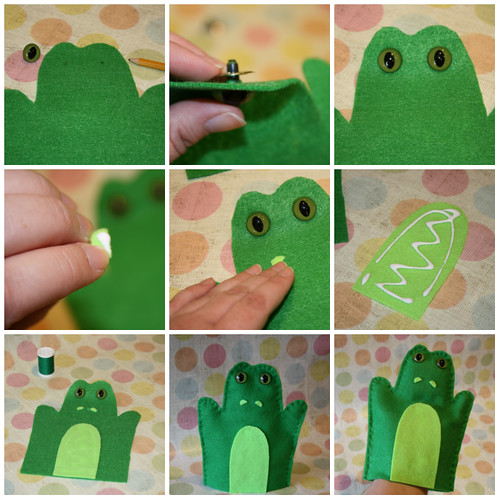
3. Using the chick pattern pieces, cut out the felt parts for the beak, head feathers, and body.
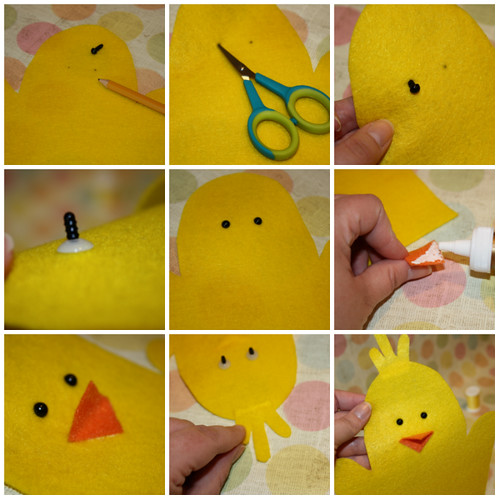
4. Mark the place on the chick's face for the eyes.
5. Cut holes in the felt for the plastic safety eyes.
6. Insert the plastic eye.
7. Firmly secure the washer to the back of the plastic eye.
8. Repeat steps 5-7 for the next eye.
9. The beak is a square, but folded point to point, it is a triangle. Glue half of the beak to the face.
10. Fold beak.
11. Glue top feathers onto back of head.
12. Let dry!
13. Once the glue is finished drying, pin the 2 body pieces together.
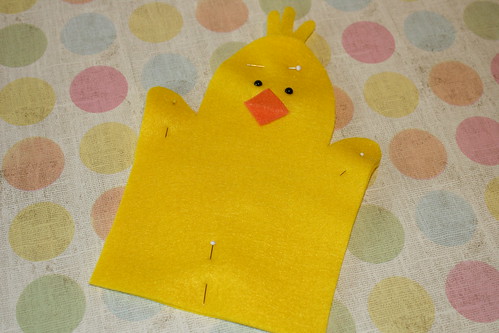
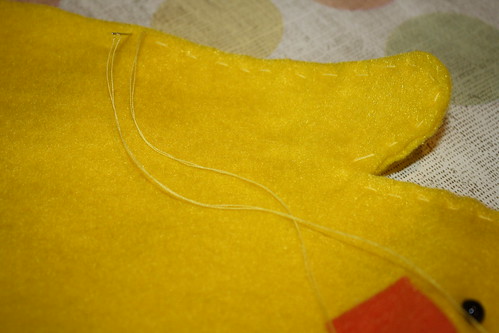
14. With a running stitch (needle up through, needle down through, repeat) finish the sides of the chick to create your puppet. Leave the bottom open for your hand!
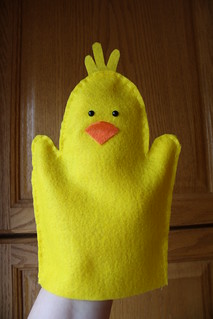
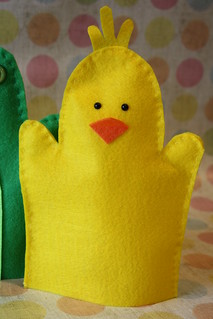
Now you have a chick hand puppet for Spring! Follow similar steps to create the frog and bunny puppets!
FROG PUPPET
1. Download the free pattern I created for the Spring hand puppets.
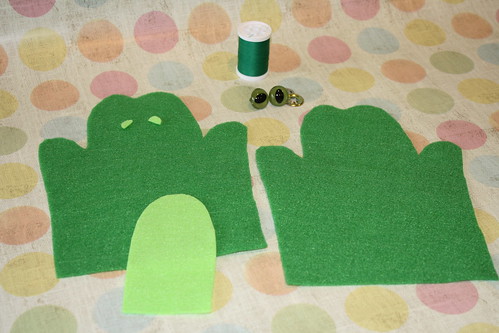
2. For the frog puppet you will need:
Two shades of green felt
Green animal safety eyes (can be found at any craft store)
Glue
Green thread & a needle
3. Using the frog pattern pieces, cut out the felt parts for the belly, nostrils, and body. Notice that the frog body has a heart shaped head, and not the rounded head like the chick and bunny.
4. Mark the spot for the plastic safety eyes.
5. Insert the eye and secure the washer firmly on the back.
6. Insert next eye.
7. Put glue on frog nostril pieces.
8. Attach nostrils to frog face.
9. Add glue to frog belly.
10. Place belly on frog and let glue dry.
11. Stitch up sides of frog puppet with a running stitch.
12. You have a frog puppet now!

BUNNY PUPPET
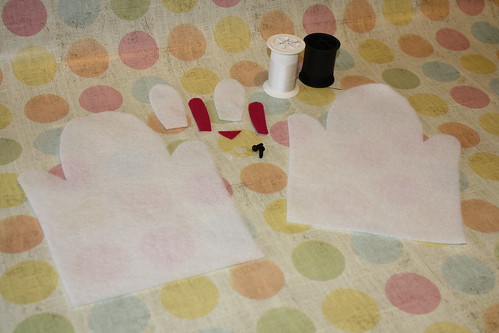
1. Download the free pattern I created for the Spring hand puppets.
2. For the bunny puppet you will need:
Pink and white felt
Solid black safety eyes (can be found at any craft store)
Glue
White and black threads & a needle
3. Using the bunny pattern pieces, cut out the felt parts for the ears, nose, and body.
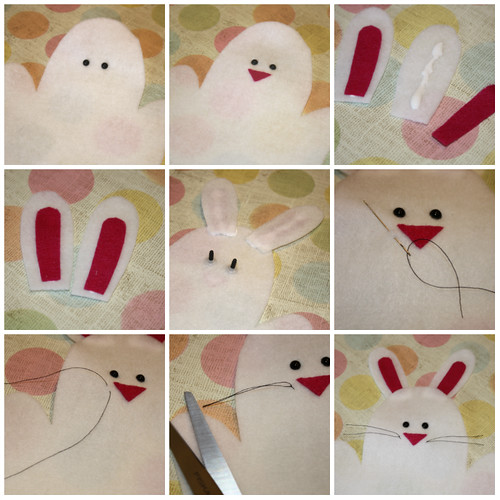
4. Insert plastic safety eyes on bunny face.
5. Glue nose to face underneath eyes.
6. Glue pink inner ear pieces to white outer ear pieces.
7. Let glue dry.
8. Glue ears to back of bunny head.
9. Using the needle, sew a piece of thread through the bunny's face by the nose.
10. Tie thread together on face.
11. Trim the bunny whiskers.
12. Make whiskers on other side of bunny nose.
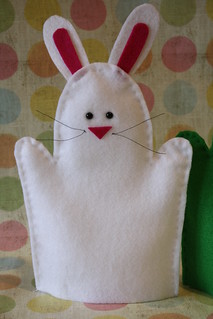
13. Let bunny ears dry and then stitch up sides of bunny puppet with white thread.
These Spring hand puppets will make the best Easter basket stuffer! They are much more healthy than candy, and last longer too! (As a bonus, print out some Spring gift tags to hang from your Easter baskets!)
I hope that you enjoyed this craft! If you are local, you can watch me make these puppets on WDRB in the Morning this Wednesday morning, March 20, 2013. Julee from D.I.Y. Louisville will be on air too, making some cool Easter baskets. As always, if you miss it, you can check my facebook page for the online video.

3 comments:
thanks for the patterns and instructions. We make puppets at our local Senior Center for Operation Christmas Child Shoeboxes. these are perfect for us to add our frog this year. Thanks again.
Post a Comment