Friday, August 30, 2013

Back to School crafting on TV!

Crafty Wednesday is every other week on WDRB in the Morning here in Louisville. I love having the opportunity to share my crafty projects on television. It can be intimidating, but I try my best!


This week I made a cool back to school project: a zipper pouch made completely out of zippers! Check out the video below to learn how to make this project for yourself. Of course you can also find the full instructions here.

Wednesday, August 28, 2013

Zip Zip pouch tutorial

Now that school is in session it's a good time to do some back to school crafting. Last time on WDRB in the Morning, I made a back to school book bag, and now I have created this project tutorial for a Zip Zip pouch! Why have I dubbed it a Zip Zip pouch? Well, because it's a zipper pouch made completely out of zippers! The fun thing about it is being able to open any zipper on the pouch to put pencils and supplies inside! 

Zipper pouch tutorial by Craft E Magee

To create this pouch you will need 10-12 zippers that are long enough to hold your pencils or supplies. The more zippers you have, the taller the pouch will be. Just be sure to choose an even number of zippers so that the front and back sides of the pouch will be the same size.

Zippers

Take the first two zippers and sew them together on one side. You can hand stitch or machine sew. If you stitch by hand, a simple whip stitch will do. If you sew by machine, be sure to use your zipper foot to make the task easier.

Zipper pouch step 1

Once you have sewn these 2 zippers together, continue to add the next 10 zippers. You can have all the zippers facing/running the same way, or you can have them alternating. It is really up to you.

Once you have your sheet of zippers, unzip one in the middle, since this is how you will turn it right side out later. Sew the first and last zipper together to create a "tube." 

Zipper pouch step 2

Finish the pouch by sewing both open ends of the "tube" closed. You may want to sew over the ends a few times for secure edges. You should have an opening where the zipper was undone. Use this opening to turn the pouch right side out.

Zipper pouch step 3

Here is the pouch being turned right side out. Poke your fingers in the corners to smooth out the pouch.

zipper pouch made of zippers

Now the pouch is complete! You can open any zipper, which is a lot of fun. Remember, there is no wrong way to do this, and alternating zippers would be just as fun!

Zip pouch made of zippers by Craft E Magee

Use your pouch for pens, pencils, markers, or any supplies for school! 

Zipper Pouch by Craft E Magee

I hope that you enjoyed this fun back to school project. Zip Zip pouches are the best!

Zipper Pouch Tutorial

Tuesday, August 27, 2013

Hearty Hungarian Meal

Almost six years ago I had the privilege to spend a semester living abroad. I met so many amazing people and saw some spectacular places. I lived in Brno, Czech Republic, but also traveled to Sweden, Poland, and Hungary. A lot of the European cuisine was new to me, but there are many times now when I miss those tasty meals! 


Hungary, known for its Paprika, had a lot of hearty food, and I especially missed a meal made with potatoes and sausage. I attempted to try my hand at that dish recently. 

IMG_2813
My co-worker recently gave me some of her family's farm-fresh potatoes, so really it was the perfect time to try this dish. 
IMG_2778
Of course I had to get some real Hungarian paprika! I was able to find this spice in my local grocery store. The meal that I was attempting to create was basically just potatoes, butter, sausage, and paprika, but on the internet I found a recipe using onions, tomatoes, and peppers.
IMG_2783
First I sauteed 1 whole yellow onion in butter and olive oil.
IMG_2785
Once the onion was cooked down a little bit, I added 2 peeled tomatoes and 1 green pepper.
IMG_2787
After all the veggies are simmering, it's time to add the potatoes!  
IMG_2788
Next I covered in water and added the paprika for flavoring. 
IMG_2790
Let the potatoes cook through, about 30 minutes or more on simmering.
IMG_2792
In another pan, cook some kielbasa style sausage.
IMG_2795
Once the meal is cooked, add the sausage to the hearty potato dish and serve with fresh bread. The bread can sop up all the paprika flavored juices. Although the dish was really yummy, it didn't quite live up to my memories! I think the dish in Europe had more butter. I think next time I will cook the potatoes alone, drain the water, and then add butter to the potatoes and add the paprika and sausage. That might be more like the original!
IMG_2810
Here is the recipe that I used in case you want to give it a try.
Paprika Potatoes 
2 T butter
2 T olive oil
1 large onion
1 ½ T paprika
6-8 potatoes, peeled and diced
1 sm. green pepper, diced
1 lg. tomato, peeled and diced
water
salt and pepper
sausage (kielbasa style)

In a large saucepan, melt butter and olive oil together. Cook the onions for a few minutes. Put all of the rest of the ingredients into the pot, just barely covering the potatoes with water. Bring to a boil, then reduce to a simmer. Cook for 30 minutes or until tender. Add sausage.

Thursday, August 22, 2013

Book Recommendations: Fiction

Summer may be winding down, but I am hoping to continue my Summer reading into the Fall and Winter! I am pushing myself to read 40 books in 2013. I'm up to 25 so far, so I am hopeful to stay on track and meet my goal.

book-recommendations

I am fortunate to be surrounded by lots of readers who are always sharing books with me. I think my Mom is really the one who instilled that love of reading in me. One of my favorite family excursions as a kid was going to the Library with her and my brothers. I even still have my very first library card from 1st grade, faded and cracked, but so special because it has my signature from when I was six years old!

Reading is something that I love to do every day. It is the perfect way for me to relax and unwind so it is a night time routine for me!

Recently I've read some really good books, so I thought I would share my recommendations. Of course I would like to hear your recommendations too!

Atlas of Unknowns by Tania James
Written by an author raised in my hometown of Louisville, Kentucky, this book was one of my Summer favorites. It is the story of two sisters from India, and what happens to them when one goes to live in the United States. I was so impressed by this novel which is Tania James' first. James has such a knack for storytelling, at one point mesmerizing me just by describing the handcrafted wedding invitation made by one of the characters. I am so thankful to the co-worker who lent it to me to read!

The Girl Who Circumnavigated Fairyland in a Ship of Her Own Making by Catherynne M. Valente
You may have noticed that I like stories with strong female characters, and this is definitely one of those books. Written for a young adult audience, this book tells the story of September, a little girl whisked away from her boring life in Nebraska to a magical place called Fairyland. Only, Fairyland is not as happy as it may seem, so September sets out to help, making many friends along the way.

Inside Out and Back Again by Thanhha Lai
I learned about this book from a magazine and added it to my long list of "to-reads." I casually looked for it at the local library and once I saw the cover, I had to pick it up. I know that you are not supposed to judge a book by its cover, but how could you not? The artwork is amazing! Inside Out and Back Again is the story of one Vietnamese family's journey to the United States to escape the Vietnam War. Told through poems, Lai's book was at times heartwarming and at times heart-wrenching. I am always fascinated by stories told from different perspectives (like what it means to be an outsider) and this was one of those stories that was achingly beautiful. I really recommend picking up this book.

Don't forget to share your current reads and recommendations with me by commenting on this post!

Wednesday, August 21, 2013

Videos: Two Sewing Projects

Here are the videos from my latest appearance on WDRB in the Morning

Make your own bias tape/quilt binding:


 Back to school tote bag:

I also shared instructions for the bias tape and book bag on my blog. I hope that you enjoyed my performance on WDRB, for the series that I've dubbed Crafty Wednesdays. I always enjoy crafting on television with my friend Julee, who will join me again next week on Wednesday, August 28. Tune in, or see the videos later on our youtube channels here and here.

Tuesday, August 20, 2013

End of Summer Popsicle Party Printable

It is hard to believe it, but Summer is coming to an end. What better way to close the Summer but with a popsicle party! I thought I would try my hand at making some handmade popsicles and it inspired me to make this Printable Popsicle Banner.

Printable-popsicle-patterns

The popsicle designs on the printable range from caramel swirled to chocolate dipped, to fruit filled, but all of them are colorful and happy! Once you have printed all three pages, you can get to work crafting the party banner decoration.

Printable-popsicle-party-banner-decoration

To make the banner you will need glue, wood sticks, string, tape, and scissors. Cut out each popsicle design and glue the wood sticks to the back to complete each popsicle.

Printable-popsicle-craft

Popsicle-craft

Popsicle-Printable-Craft

Allow the glue on the popsicles to dry and then tape the popsicles to the string to create your popsicle party banner. 

Free-Printable-Party-Banner

This banner would be great for a summer-end party, birthday party, or any other occasion that calls for some color! And don't be afraid to try to make your own popsicles at home! I tried different fruit and juice combinations, cutting fun shapes with cookie cutters before placing them in a popsicle tray and freezing. 

strawberry-flower

make-your-own-popsicles

My favorite combination so far has been lemonade with raspberries. The lemonade was really sweet and the raspberries were tart, so it was a fun combination. I hope that you had an amazing Summer, and that you can use my free popsicle printable banner to stretch the season just a little longer.

d.i.y. popsicle

Monday, August 19, 2013

Kentucky State Fair 2013

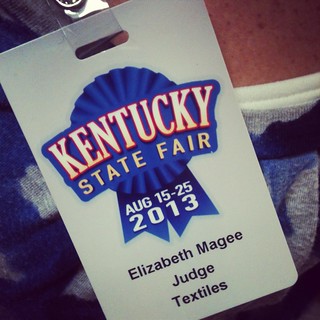
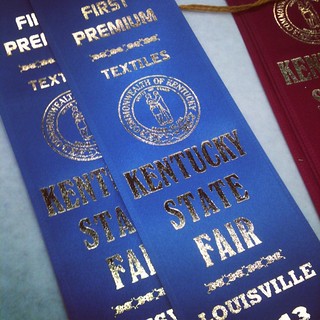
Earlier this year I was invited to be a judge at the Kentucky State Fair. Of course I was excited to accept! Last week it was finally time to flex my judging skills and it was a really neat experience. The staff and volunteers in the textiles section, where I was judging, were so welcoming and helpful, and really took me under their wing as a first-time judge.

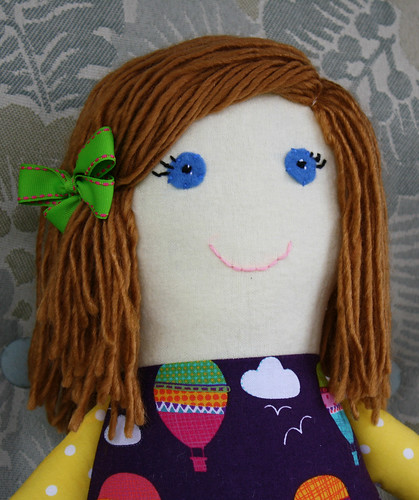
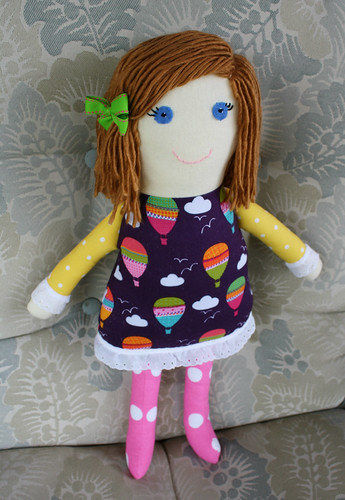
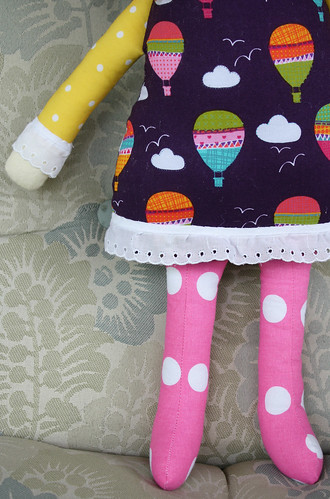
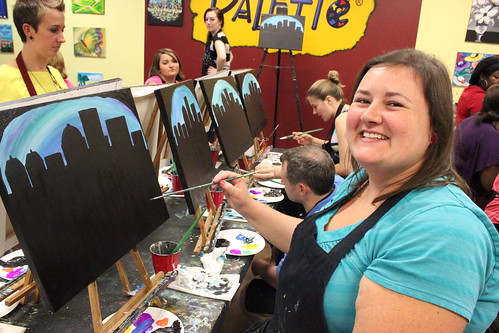
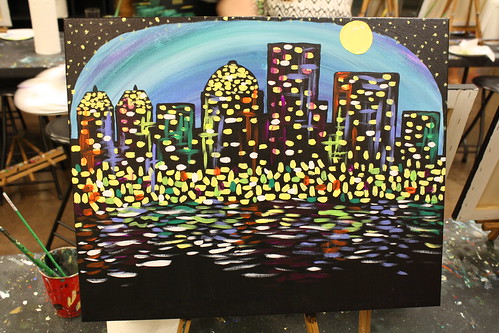
I was fortunate to be able to see some really incredible handiwork by different crafters and artists from around the state. It was a blind judging, so I did not have any information about the artists while judging, except on the juniors section. The juniors section was full of crafts made by people under the age of 17. These were my absolute favorite! It was so invigorating to see young people (as young as 6 years old!) participating in the State Fair and a lot of the projects were really good. It was really fun to see.

Untitled Untitled  
This weekend, I was able to go with my nephew as a visitor to the Kentucky State Fair. We always enjoy looking at the different booths, 
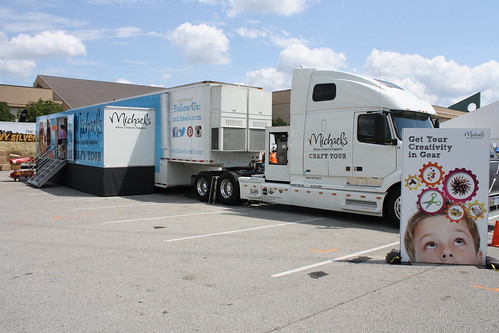
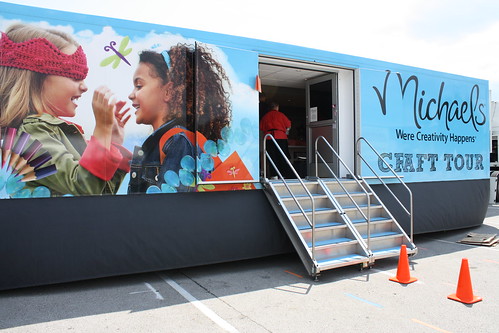
and creations, but this year we also enjoyed some of the special events. One of those things was the Michaels Craft Tour truck, which was really cool. The semi truck trailer was set up like a workshop inside, with tables and chairs and all the supplies you could think of to make 2 craft projects. One was a decoupage tile locker decoration craft and the other was a fun pencil topper for back to school.

IMG_0286

IMG_0311 

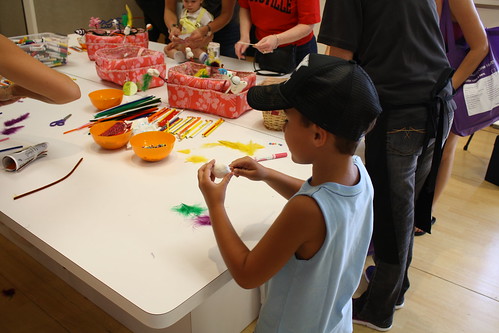
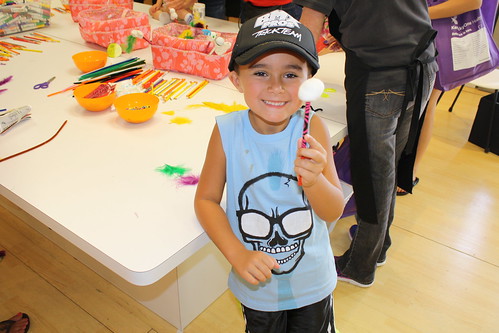
My nephew really enjoyed using the modeling clay they provided, along with feathers, pipe cleaners, and some googly eyes to make his pencil topper. 

IMG_0291

IMG_0292

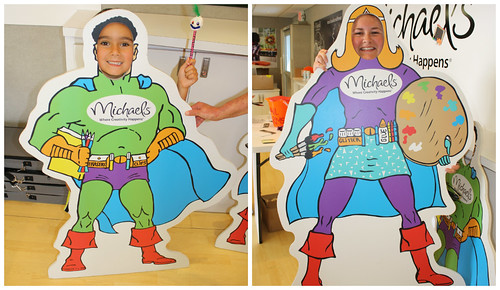
Michaels even had some fun photo props on hand for people to use. My nephew and I got into character as Craftboy and Craftwoman, which made us laugh.

collage1

The best part about the Michaels Craft tour truck was seeing the different people of all ages coming together to craft. Plus, Michaels provided all the crafts for free! 

IMG_0290

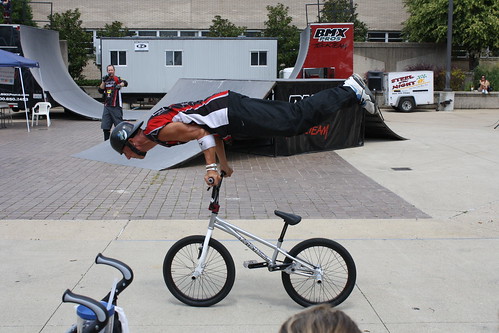
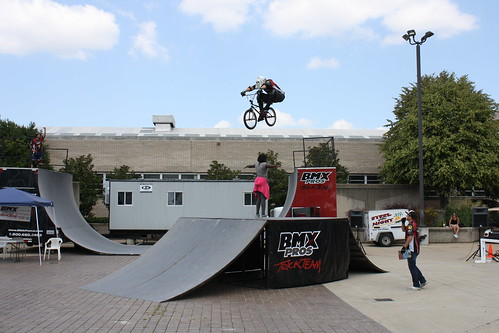
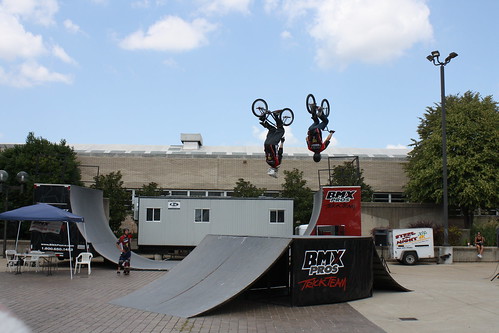
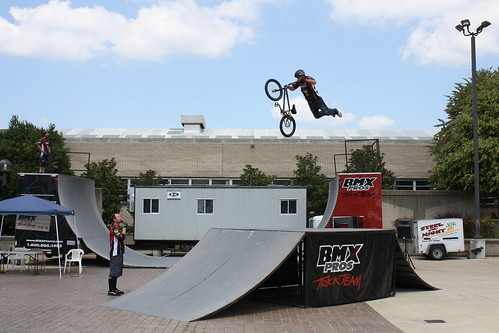
The other thing we really enjoyed at the Fair this weekend was the BMX performance. We saw some really awesome extreme tricks by the team and we were so impressed. My nephew was especially excited to see the show.

IMG_0141

IMG_0158

IMG_0261

IMG_0129

My nephew made sure to get in line for an autograph afterwards and was pumped to meet such talented bicycle motocross athletes!

IMG_0271

It was definitely an action-packed day. We saw a lot of cool stuff, participated in some fun activities, and wore ourselves out in the sun! We always have a great time at the Kentucky State Fair.

Friday, August 16, 2013

Caidence the Doll

Meet Caidence!

She is the latest of my handmade dolls, and a custom order for a special little girl on her birthday. I was really excited about using this hot air balloon fabric for her outfit. I had been saving it for a Kentucky Derby Festival craft for next year in honor of the balloon race, but I am glad that I had a chance to use it sooner. 

I also used some adorable polka dots fabrics in yellow and pink for her sleeves and leggings! Who doesn't like polka dotted leggings, right?!! Caidence the doll has hair made from a fun wool yarn that has a neat twisted texture to it. I also had to add a homemade bow to her hair, and add some lace fringe to her sleeves and skirt. 

She already went home to her new owner, and the family shared some sweet photos with me of the birthday girl kissing her new doll! It made me so happy to see. Sharing my crafty talents is the best part about this hobby. It makes me feel all fuzzy inside, which must be what it feels like to be a stuffed dolly! :)

Handmade-Doll-by-Craft-E-Magee

Handmade-Doll-Caidence

Handmade-Doll-by-Craft-E-Magee

I really enjoy making handmade dolls, although I have less time for it these days. Dolls were once the major focus of this blog, but I am glad that I have branched out into other craft projects and tutorials. It is nice to be able to share a new doll face every now and then, so I hope that you enjoyed meeting her.

Thursday, August 15, 2013

Around Town: Pinot's Palette - St. Matthews

Have you ever heard of a place called Pinot's Palette? I visited the Louisville location recently to attend a Louisville Bloggers night with Julee from D.I.Y. Louisville.

Pinot's-Palette-Louisville4

It was my very first time attending a painting class, and I have to admit that I was a little intimidated. What if my painting didn't turn out? 

We received a warm welcome as soon as we arrived and overall the experience was a lot of fun, even without drinking! Of course, the "paint and sip" part of the class seemed like a hit with the other guests, making for a fun and casual atmosphere. Some guests were celebrating birthdays, and they got a gift from Pinot's Palette, which I thought was a special touch.

Pinot's-Palette-Louisville1 

 People were allowed to mingle before class. I sat down to a blank canvas and was excited to see my name written in chalk at my work station. The studio has everything you could need from aprons and supplies, to cubby holes for your purse or belongings so you don't get paint on them.


  Pinot's-Palette-Louisville5

The painting that we were creating was called "Uptown City Lights." Once the instructor said it was time to get started I was worried that I would have trouble following along with the painting, but because of the way the instructor taught each step one by one, it was actually very easy!

Pinot's-Palette-Louisville2

We painted the background colors first and then set to work sketching out the Louisville skyline. It is definitely one of their more popular paintings. The studio serves as a gallery of sorts, with numerous paintings decorating the walls, and there are several variations of the Louisville skyline!

Craft-E-Magee-at-Pinot's-Palette-Louisville

Pinot's-Palette-Louisville-Skyline-Painting

It was a great evening, and I definitely enjoyed laughing and painting with Julee. The Pinot's Palette staff was so helpful and made us feel right at home. I would definitely recommend considering a class by checking out their schedule, or looking for a Pinot's Palette location close to you. You could have fun solo, but it seems like a lot more fun with a friend or in a group. 

Pinot's-Palette-Louisville-Craft-E-Magee

Have you ever painted in a class like this before? Leave me a comment sharing your thoughts! Which painting on their schedule would you choose?