
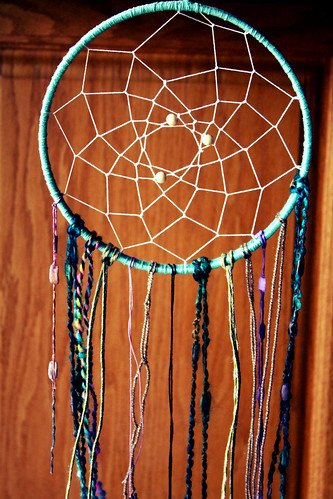
I love the folklore surrounding dream catchers. The idea is that
when this decoration is hung above the bed, bad dreams get caught in the web
while the good dreams pass through the circle and travel down the ribbons and
feathers into the head of the sleeper. It is a very popular craft, taught in
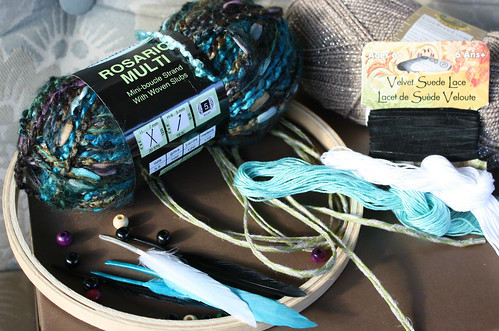
summer camps around North America! Feel free to use any supplies that you have
on hand, whether it means using sticks and feathers from the yard, shells and
driftwood from the beach, or yarn and ribbon from the craft store.
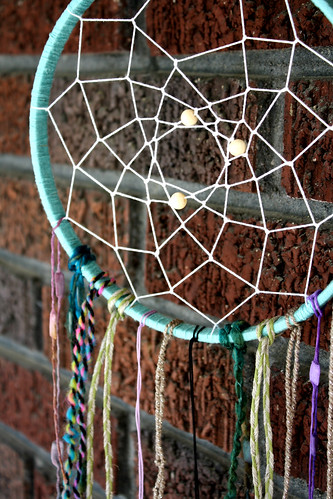
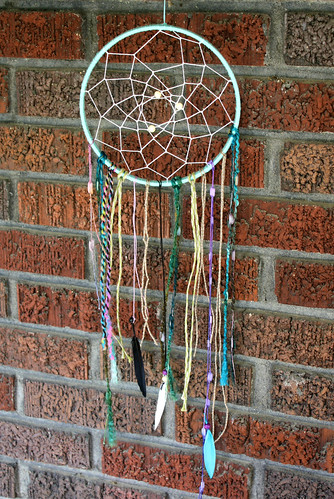
For my dreamcatcher I used fun yarns, string, dyed feathers
& beads, and the inside ring of an embroidery hoop for the circular base.
You could also bend the hoop shape from wire or anything else you can come up
with in your imagination.
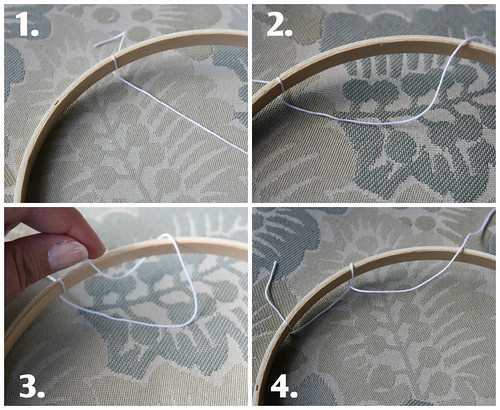
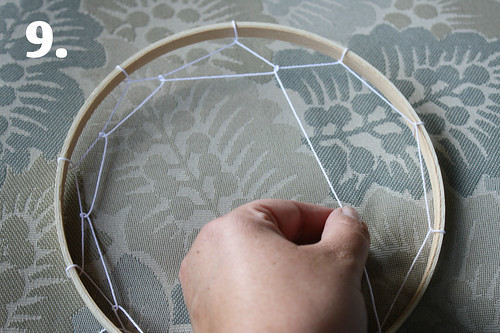
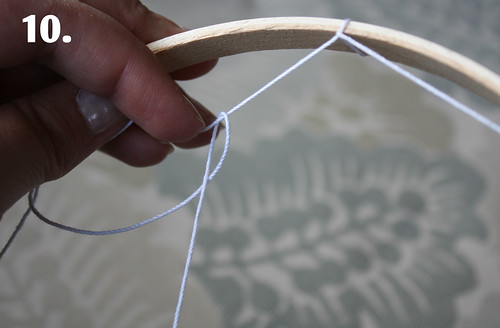
To start, tie one end of a small spool of string or thread to the wooden embroidery hoop. Once the end of the string is secure, wrap the string around the wood a few inches to the right, bringing the spool through the middle of the hole. Leave the string loop a little bit loose and repeat these steps all around the ring.
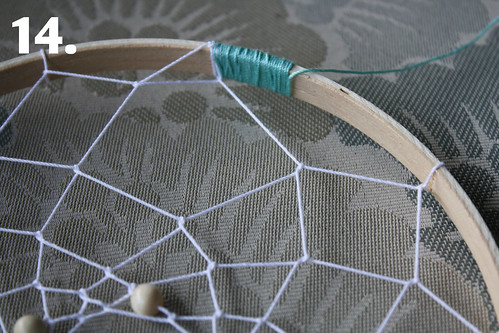
When you have done this around the entire circle, repeat steps but wrap the string around the center of the first loop of string this time, instead of the wood. Continue making loops through the first row of string all around the circle. Once you reach the end again, repeat steps by looping through the second row all around the circle.
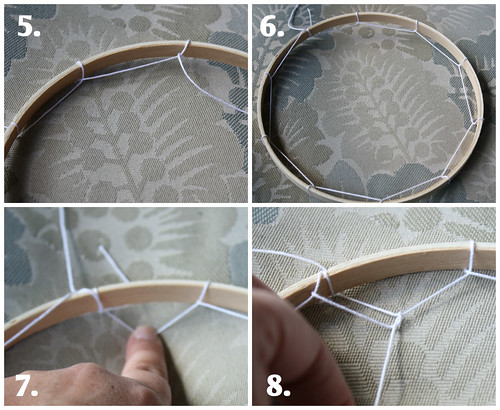
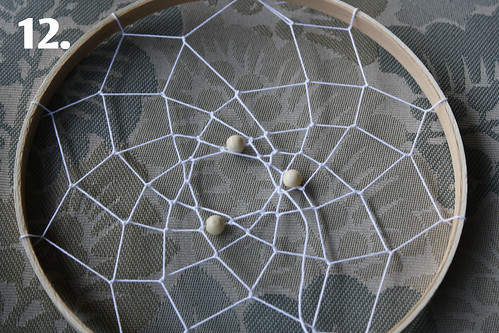
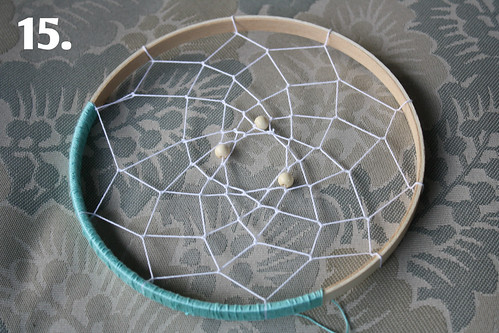
You can add beads to the “web” as you go, in whatever pattern you like. To do this, just bead the string and make a loop. Continue the loop-making steps until you are close to closing the gap in the center of the web.
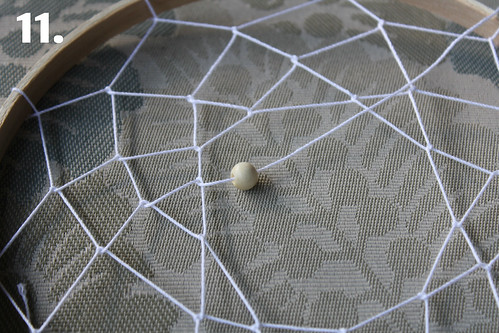
You do want to leave a hole in the center of the web you are creating. The size can be up to you. To do this, just finish a row of loops and then tie off the end of the string to the web. The knot will be too small to notice. Cut off the excess string.

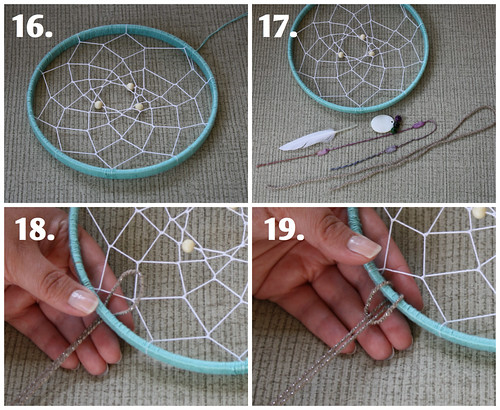
The final step is to decorate the your dreamcatcher. You can wrap an alternate color of string around the wooden hoop to give it a different hook, or you can leave the bare wood. I used teal string around the wooden hoop and white string for the center of the dreamcatcher. (Optional: You can also wrap the hoop with the different color string before you begin creating the web. That might be easier for some crafters).
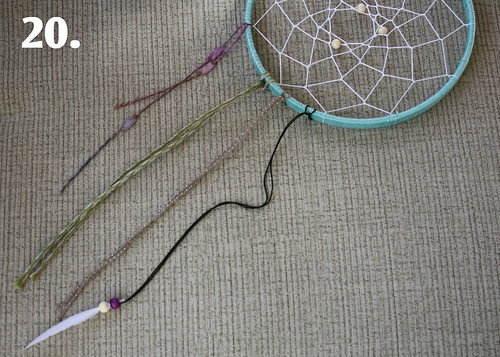
You also want to hang some feathers or string on the bottom of the dreamcatcher. I think that using a stash of eclectic yarn, ribbon, and string and looping them around the bottom of the circle is the best way to go. You could go with matchy matchy stuff, it’s just not my taste. If you don’t have beads, you can use shells. If you don’t have feathers, you can use leaves or fabric. It is really up to you!
1 comment:
So fun! I always thought the web would be more complicated to create. You make it look so easy!
Post a Comment